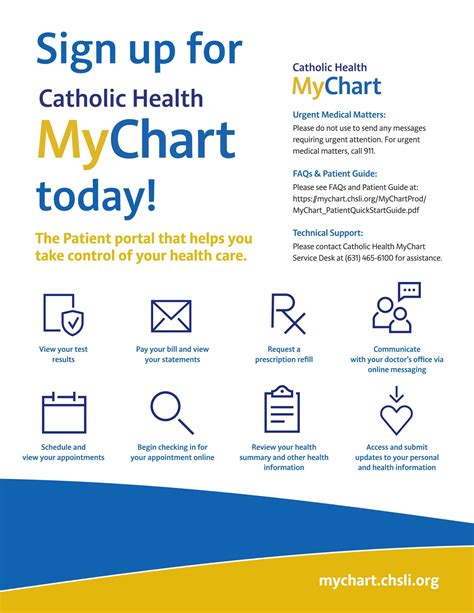
Navigating the complexities of managing your health can feel overwhelming, especially when trying to keep track of appointments, medications, and test results. That’s where Catholic Health Services My Chart comes in. This user-friendly tool provides you with a comprehensive and secure way to manage your healthcare information online. In this guide, we’ll explore step-by-step guidance, actionable advice, real-world examples, and practical solutions to help you make the most of your My Chart account.
The Importance of Catholic Health Services My Chart
Catholic Health Services My Chart offers numerous benefits for managing your health. It allows you to access your medical records, schedule appointments, communicate with your healthcare providers, and manage medications. This platform enhances your healthcare experience by providing convenience and ensuring you have all necessary health information at your fingertips. Using My Chart can lead to better health outcomes, reduced anxiety about your health, and more informed decision-making.
Why You Need This Guide
Many users struggle with the initial setup and finding the right tools within the My Chart platform. This guide is designed to address those pain points, offering clear, actionable steps to help you navigate the platform effectively. Whether you’re a first-time user or looking to refine your existing usage, this guide provides practical examples and expert tips to ensure you get the most out of Catholic Health Services My Chart.
Quick Reference
Quick Reference
- Immediate action item: Create your account and verify your identity to start accessing your health information immediately.
- Essential tip: Use two-factor authentication for added security.
- Common mistake to avoid: Misplacing your password—use a password manager or note it down securely.
Setting Up Your Account: Detailed Steps
Getting started with your My Chart account is straightforward but requires some preparation. Follow these detailed steps to ensure a smooth setup.
Step 1: Registration
To start, you will need to register for a My Chart account. This usually involves:
- Visiting the Catholic Health Services website and looking for the ‘My Chart’ option.
- Finding the ‘Sign Up Now’ button and selecting it.
- Providing the required personal information, including your full name, date of birth, and a valid email address.
- Receiving a registration confirmation via email and following the instructions to complete your account setup.
Step 2: Verification
Verification is crucial for security purposes. Here’s how to complete it:
- Check your email for a verification code from Catholic Health Services.
- Enter this code in the designated field on the My Chart website to verify your identity.
- If you don’t receive the email, use the ‘Resend Verification Code’ option.
Step 3: Setting Up Security Features
Securing your account is essential. Here’s what to do:
- Set a strong password and change it periodically.
- Enable two-factor authentication (2FA) to add an extra layer of security.
- You can set up 2FA through the security settings in your My Chart account.
Step 4: Connecting Your Medical Records
Once your account is set up and verified, link your medical records:
- Navigate to the ‘My Health’ section in your My Chart account.
- Select ‘Connect Your Medical Records’ and follow the prompts.
- You might need to provide some additional information or upload a consent form.
Step 5: Familiarizing Yourself with the Dashboard
Understanding the layout and functionalities of your dashboard is key to effective use:
- Explore the main tabs: ‘Appointments,’ ‘Medical Records,’ ‘Messaging,’ and ‘Billing.’
- Take note of shortcuts and help options available.
- Consider setting up custom alerts for medications or upcoming appointments.
Navigating Appointments: Detailed Steps
Managing appointments can be simplified with My Chart, making it easier to keep track of your healthcare schedule.
Scheduling Appointments
Scheduling new appointments through My Chart is straightforward:
- Log in to your My Chart account.
- Navigate to the ‘Appointments’ tab.
- Select ‘Schedule an Appointment’ and choose a healthcare provider from the drop-down list.
- Choose a date and time that works for you and fill in any required appointment details.
- Review your appointment request and submit it for approval.
Managing Existing Appointments
If you already have an appointment and need to manage it, follow these steps:
- Go to the ‘Appointments’ tab.
- Find the appointment you wish to manage and click on it.
- Options to reschedule, cancel, or send a reminder might be available.
- If you need to make changes, select the appropriate action and follow the prompts.
Receiving Appointment Reminders
Stay on top of your appointments with My Chart’s reminder system:
- Navigate to the ‘Preferences’ section in your My Chart account.
- Select ‘Notifications’ and choose the type of reminders you want to receive.
- You can opt for email, text message, or in-app notifications.
- Save your settings to ensure you never miss an important appointment.
Communicating with Your Healthcare Providers: Detailed Steps
Communication with your healthcare providers is a key feature of My Chart, allowing for timely and efficient exchange of information.
Sending Messages
To send a message to your healthcare provider:
- Log in to your My Chart account.
- Go to the ‘Messaging’ tab.
- Click on ‘Send a Message’ and select the appropriate provider.
- Compose your message detailing your inquiry or concern.
- Review the message for accuracy and then send it.
Receiving Responses
It’s important to know how to receive responses:
- Check the ‘Messaging’ tab regularly for new responses.
- You may also receive notifications depending on your alert settings.
- Ensure to follow up on any instructions or recommendations from your provider.
Accessing Prescription Refills
Refilling prescriptions is a crucial aspect of managing your healthcare:
- Navigate to the ‘Medications’ section in your My Chart account.
- Find the prescription you wish to refill and click on it.
- Select ‘Refill Prescription’ and follow the prompts to submit your request.
- You may need to provide additional information or confirm with your pharmacist.
Practical FAQ
I Forgot My Password—What Should I Do?
If you’ve forgotten your password, follow these steps:
- Go to the My Chart login page and click on ‘Forgot Password’.
- Enter your username or email associated with your account.
- Follow the instructions to receive a password reset link via email.
- Reset your password by clicking on the link and creating a new password.
Can I Access My Child’s Health Records Through My Chart?
Yes, you can access your child’s health records if you have legal guardianship